Grace Burnett
Animator / Technical Artist
Tony Hawk Pro Skater 3 + 4
(Unreal Engine 4)
*restricted imagery due to confidential nature of the project
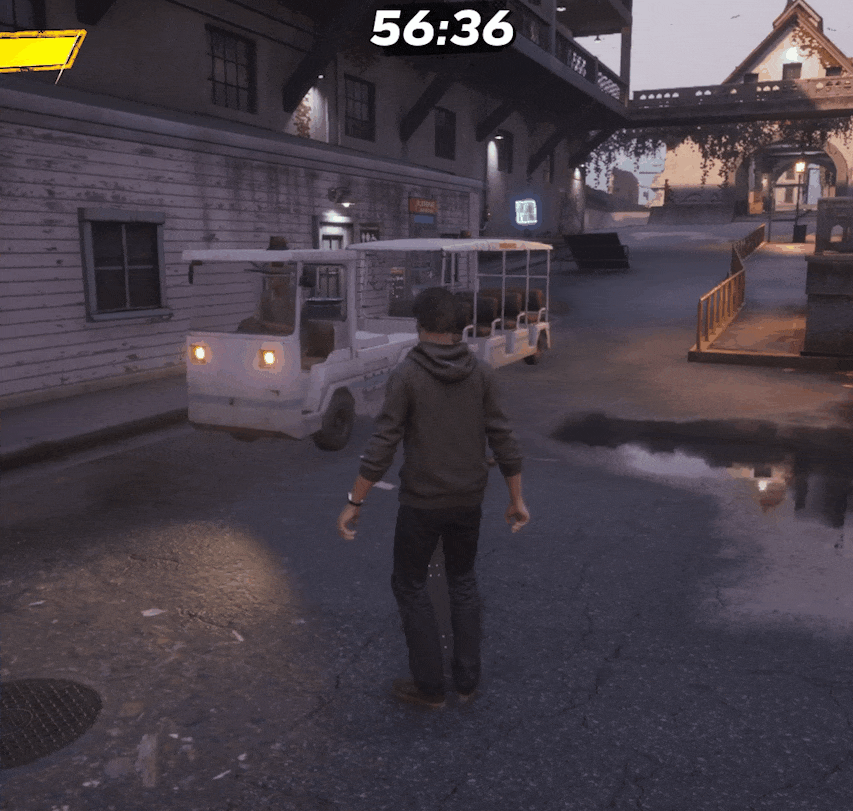
Ski Lift Chair Rigging and Spline Path Movement
To create a looping ski lift animation in the environment, I first rigged and skinned the ski lift chair model. I then imported the cable lines into Maya to get the proper world space and generated a spline path along the cable. I then baked animation keys onto the ski lift chair to follow along the spline path, creating additional layers of hand-keyed animation to add a natural swinging movement.
I exported this baked animation into engine and applied it to each chair. Having baked animation keys in world space instead of having the chairs follow along a path in engine reduced performance costs for this background environmental element.
Vehicle Skeletal Creation, Weight Painting, and Physics Asset Set up
For several vehicles in the game, I created skeletal hierarchies and painted skin weights.
I added appropriate sockets for cases like the tram and set up physics asset constraints and logic.
NPC Driver Animation Blueprint and Blendspace Integration
I created three animations in Maya on separate layers for drivers, exported a straight, left, and right turn, and created a blendspace asset to blend between them.
I then created a new animation blueprint for driver NPCs that took data from the vehicle's turning angle while following a path and fed that data into the blend-space set up so the driver animates turning left or right appropriately during a turn.


physics and driver turning blending animations

skeletal hierarchy created to match existing vehicles, individual sockets added

adding tram and tram trailer into a blueprint and placing the driver
physics and driver turning blending animations
Confidential Interactive Attraction Project (Unreal Engine 5)
*restricted language and imagery due to confidential nature of the project
Solving DCC to Engine Pipeline Export and Import Issues for Rigged Models
I was assigned several visual bugs for characters and vehicles for this client project and discovered that many models had been improperly imported into engine, which was causing morph target animation issues and material inaccuracies. I reviewed the export process and discovered there were improper UVs on some models, causing effect and material assignment issues, as well as missing blend shape exports that caused faces to not be fully animating their keyed expressions.
I tracked down these individual problems, properly exported the missing animation data, and re-assigned and organized UV and material data. I discovered some "animation" issues were actually caused by LOD clipping and improper settings, so I cleaned up that data as well to be consistent across characters.
Animation Blending for Characters in Animation Blueprints
There were several instances of animation popping and clipping on character models. The popping issues I solved by rewriting some of the state machine logic to account for all gameplay scenarios and properly transition between animation states. I added proper blends and logic for moving between states.
I discovered that the clipping issues were caused by morph target facial lip-sync animation data that was not properly blending with separately animated body movements. I cleaned up animation keys and created a blending mask within the animation blueprint that smoothed out the blending and clipping between the body and the face.
Niagara Effects for a New Game Mode and Scripted Blueprint Logic to Trigger Effects
I created a new set of effects for a special game mode that is triggered once an enemy takes a certain amount of damage. I created effects in Niagara and fine-tuned the settings there, as well as creating new materials to get the desired look on some particles.
Once the effects were created, I scripted effect activations in blueprint and added triggers within animation tracks to create impactful timing.

added state alias override for transitioning back to base state when character is respawned
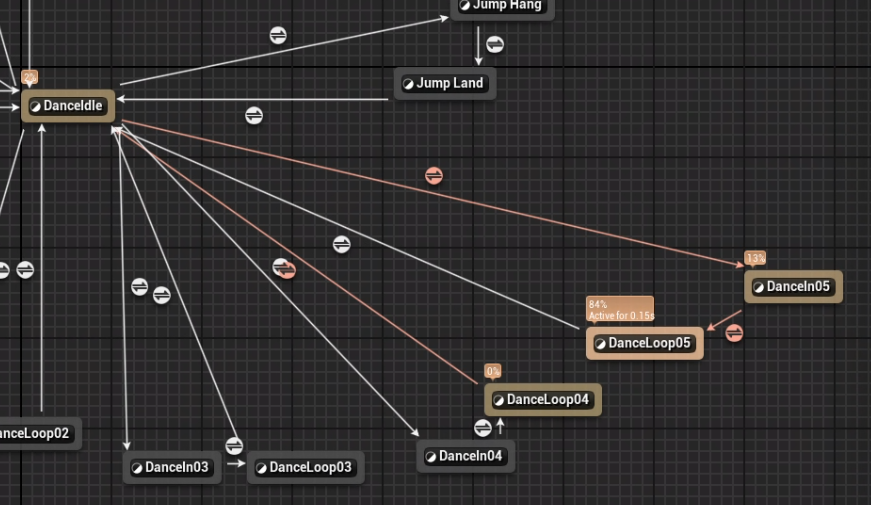
adding blend time and logic in between animation states
added state alias override for transitioning back to base state when character is respawned

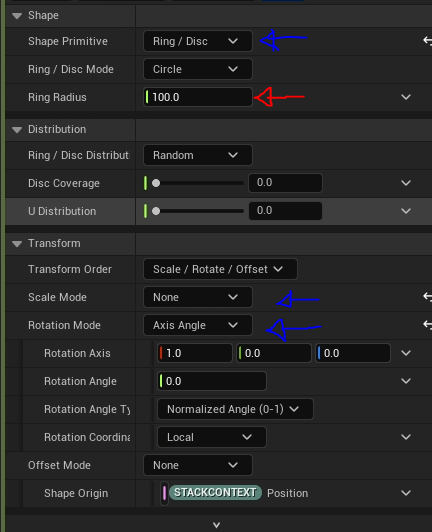
defining shape settings for a Niagara particle effect

adding and positioning a socket to a skeletal mesh as base location to spawn an effect

snipped of blueprint script for timing effects activation
defining shape settings for a Niagara particle effect
Internal Studio Horror Game Prototype (Unreal Engine 5)
*Restricted language and imagery due to confidential nature of the project
NPC Animation and Character Blueprint Scripting for Keyable "Look at Player" Functionality within Cinematic Sequences
For a cinematic sequence, the team wanted to have an NPC play an animation and slowly turn its head to look at the player. To achieve this effect, I scripted a custom "Look at Player" function in the animation blueprint. This function sets a custom "Look At Alpha" variable from the NPC character blueprint, then sets the "Look At Location" from the player character's head socket location.
In the AnimGraph, I then blended the state machine that defines the base animation behavior with Unreal's "LookAt" AnimGraph function to define the alpha and location and set the proper axis. I exposed the "Look at Alpha" in the character blueprint so that it would be keyable in a cinematic sequence. The default value is zero, and I keyed that value from zero to one in the sequence to hand key the movement at the proper time. After the sequence concludes, the NPC continues to look at the player and follow the player's movement with its gaze while playing its idle animation.
First-Person Player Animation and Character Blueprint Scripting for Blending in and out of Cinematic Sequences
There were blending issues on this project for transitioning in and out of cinematic sequences in the first-person view. I worked with designers to find a solution between animation and blueprint scripting to help with this popping. We added new variables to the player character blueprint to blend the player's location and camera rotation to where it needed to be at the start of the sequence to properly align with the environment and interactable props.
I added a new slot in the character's animation blueprint AnimGraph to help blend the character's current posing to the posing at the start of an animated cinematic sequence. Within Sequencer, the blending into the animation could be tuned using this slot in the animation track of the player character.

scripted "Look At Player" function in the NPC's animation blueprint

blending final pose between the base state machine and the "Look At" pose data

keying the "Look At Alpha" variable for a cinematic sequence in Sequencer for custom behavior in the sequence
scripted "Look At Player" function in the NPC's animation blueprint

added functionality to move player location and camera pitch to match the start of a cinematic sequence

added a slot in the AnimGraph to help blend between the base state machine posing and the posing at the start of an animated sequence
added functionality to move player location and camera pitch to match the start of a cinematic sequence